I had the sudden motivation to get my RAM to run at its intended speed, almost four years after I bought the parts for my rig. I recently upgraded my storage capacity by 1TB, so I decided that this would be a great time to do some other tuning. I have a Ryzen 7 1700 CPU on a Gigabyte AX370 Gaming K5 motherboard. The RAM that I’m dealing with is 2x16GB G.Skill Ripjaws V Series DDR4-3200 memory. When I initially put together my computer, I realized that the RAM did not play well with the motherboard/CPU at all, and after so much tweaking, I settled to run the system with the stable but slow setting of 2133MHz. It was losing out on 50% of the potential performance. I decided to follow an overclocking guide and try to settle this now to eek the last bits of performance.
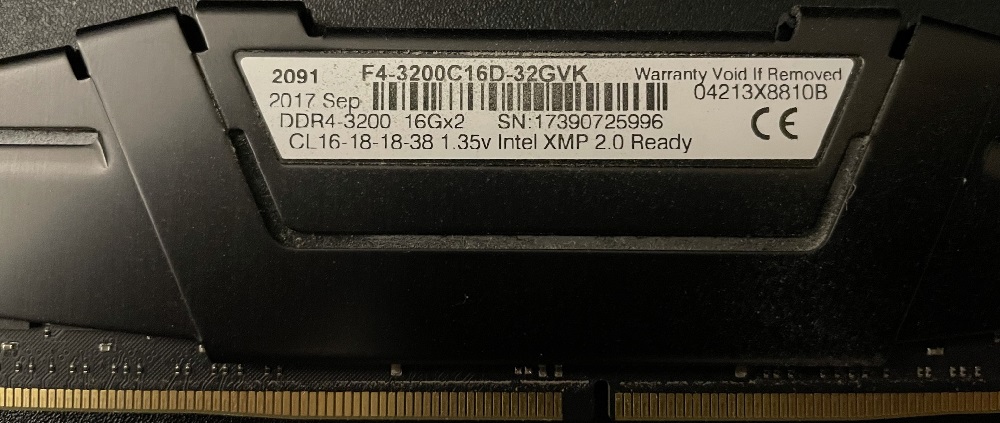 Figured: Samsung B-die, which can
be identified by the labels here using the DDR4 OC Guide
Figured: Samsung B-die, which can
be identified by the labels here using the DDR4 OC Guide
There are a few options in the bios for applying XMP (Extreme Memory Profile), but I quickly run into freezing and blue screens of death while running at higher frequencies. I decided to manually overclock my ram using the DRR4 OC Guide. Though comprehensive and a tad overwhelming, the process in action is simple. In addition, the specific IC used by the RAM performs well with overclocking in general (Samsung B-die). First, I set very loose timings (16-20-20-40 tCL-tRCD-tRP-tRAS), increased the DRAM voltage, and booted into Windows with 3200 timings. Next, I ran a memory test recommended by the guide (TM5) and found out 30 minutes later that it was unstable. Frustrated, I tried various other voltages and timings and learned about just how time-consuming overclocking is. I know that a configuration is terrible when the board power cycles 2-4 times, making a click of the fans every time and then booting into a safe default setting for the RAM (or just hanging). Sometimes, I have to fully power cycle the board by disconnecting the power supply (via the switch) and pressing on the power button to discharge residual current in the board.
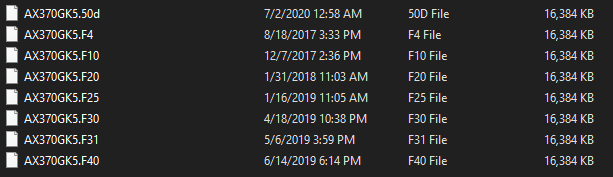 Figured: A list
of many different bios images that I loaded onto a drive, so I could get
sequencing correct for bios updates.
Figured: A list
of many different bios images that I loaded onto a drive, so I could get
sequencing correct for bios updates.
After taking a second look at my bios, I realized I was running bios from 2017
(F5a) and that there have been many versions since I had last looked at it. The
newer versions of the motherboard bios introduce AGESA updates, which allow AMD to update
the boards to adapt to things like memory timings. I decided to update to F50d,
which was released late last year. “Invalid bios image”… With a little bit of
trial and error, I found out that I had to take the long path to upgrade the
software. I went F5a -> F10 -> F20 -> F31 -> F50a, which may have had a
shorter path if I had diagnosed a “bios id check” error with more certainty. In
any case, with updated bios, I’ve been able to run my RAM at its intended clock
rate without running into stability issues (at least for the last few hours,
during the time of writing).
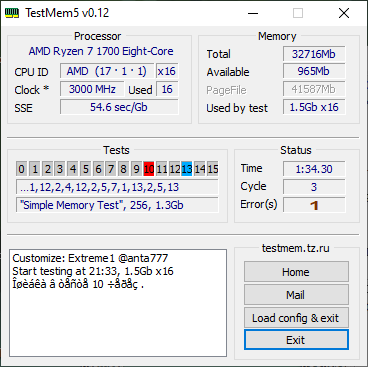 Figured: An in-progress
TestMem5 test that shows general stability (i.e. no blue screens yet).
Figured: An in-progress
TestMem5 test that shows general stability (i.e. no blue screens yet).
If I were to do this again, I probably would have bought a slightly more powerful CPU so that the whole system was stable, running at advertised clock speeds without any fiddling. It has been a learning experience, although, at the end of it, I’d prefer that it wasn’t such a labor-intensive process to find suitable voltages and timing for the system to not crash in the middle of browsing. Alas, about 3 hours into usage, I ran into my first blue screen and realized this whole thing is something that I’ll leave for several more days of tinkering.